Tcp Access Control Jnos

Jnos works with an access control list. Here a small example what you can put in there. There are things double in it, this is just an example what is possible

# ACCESS CONTROL
#===============
#Allow a specific Hostname (eerst ff wachten "now+0001" tot de dns online is)
at now+0001 "tcp access permit packet-radio.net all"
# Localhost (altijd handig)
tcp access permit 127.0.0.1 all
# Ampr.org (Compleet ampr.org netwerk)
tcp access permit 44.0.0.0/8 all
# Nederlands Ampr.org netwerk
tcp access permit 44.137/32 all
# Eigen Ampr.org netwerk
tcp access permit 44.137.31.64/27 all
# Lokaal netwerk
tcp access permit 192.168.1.0/24 all
# Lokaal netwerk met toegewezen poort
tcp access permit 192.168.1.175/24 25 110
# Friendjes :)
tcp access permit 82.176.45.213 all
# blacklist bad logins for 15 minutes (900 seconds)
mbox blacklist 900
# run expiry process every 20 minutes
tcp access expiry 20
# Acces deny (Bad boy)
tcp access deny 81.21.45.213
# Subnet access to ports 1 through 25,
tcp access permit 23.1.46/24 1 25
tcp clean


Xnet axudp link Jnos

The axudp link from xnet to jnos has caused a lot of problems.
But he is up and running … Here the explanation.

In the line “attach axudp xnet 256 192.168.1.112” (jnos) is the secret.
This must therefore “not” refer to the ip address of xnet like you
have indicated in ip.net at myip, but to the IP address of Linux itself.
So the ip address of (for example) eth0

Autoexec.nos (Jnos)

attach tun tun0 1500 0
#
ifconfig tun0 ipaddress 192.168.1.222
ifconfig tun0 netmask 255.255.255.0
ifconfig tun0 mtu 1500

shell ifconfig tun0 192.168.1.221 pointopoint 192.168.1.222 mtu 1500 up
pause 2
shell echo 1 >/proc/sys/net/ipv4/ip_forward
shell /usr/sbin/arp -i eth0 -Ds 192.168.1.222 eth0 pub

attach axudp xnet 256 192.168.1.112 (ip-adres Linux (eth0))
ifconfig xnet description "axip link xnet"

Eth0 (Linux)

eth0      Link encap:Ethernet  HWaddr 00:12:3f:2b:c6:6f
          inet addr:192.168.1.112  Bcast:192.168.1.255  Mask:255.255.255.0
          inet6 addr: fe80::212:3fff:fe2b:c66f/64 Scope:Link
          UP BROADCAST RUNNING MULTICAST  MTU:1500  Metric:1
          RX packets:7844 errors:0 dropped:0 overruns:0 frame:0
          TX packets:7255 errors:0 dropped:0 overruns:0 carrier:0
          collisions:0 txqueuelen:1000
          RX bytes:885500 (864.7 KiB)  TX bytes:1166950 (1.1 MiB)
          Interrupt:16

Ip.net (xnet)

IP.net
#        File: IP.NET
#       (X)Net IP Address
#
myip 192.168.1.201
subnet 192.168.1.0/24
#
# ARP entry for all received IP Frames
arp add 192.168.1.201 slip sdev6
#
#
# Default route
ipr add default SLIP 192.168.1.201
#
iproute add 192.168.1.0/24 slip 192.168.1.201

Autoboot.net (xnet)

attach IP0 axudp 0 1 192.168.1.222   (Ip-adres van Jnos) 

po 0 acon 1
po 0 baud 9600
po 0 dup 0
po 0 win 7
po 0 quality 0
po 0 name pd2lt
r bc ad 0 pd2lt
r bc ad 0 nodes
ro lo a 0 pd2lt-9 d


Monitor script F6fbb

Brain N1URO has written a script to see if fbb is still running.
I saved this script in the fbb directory.
/usr/local/etc/ax25/fbb

Have it saved as “fbbcheck” now it is possible to call it via a cronjob every hour.

Edit the /etc/crontab file and add the following.

15 *    * * *   root    /usr/local/etc/ax25/fbb/fbbcheck

Now, every 15 minutes after the full hour, it is checked whether fbb is still running, otherwise it will be restarted.

Here under the “fbbcheck” script.

#! /bin/sh

. /lib/lsb/init-functions

MYFBB=`ps ax|grep fbb|grep xfbbd|grep sbin|awk '{ print $1 }'`
PID=`ps ax|grep fbb|grep xfbbd|grep sbin|awk '{ print $1 }'`

if [ -z $MYFBB ]
  then
   log_warning_msg "FBB BBS not found running"
   sleep 2
   log_action_msg "Reloading FBB... "
   sleep 2
   /usr/local/sbin/fbb -s -a
   log_daemon_msg "FBB Reloaded" "done"
   log_end_msg 0

exit 1
fi
  log_action_msg "FBB PBBS is running on pid: $PID"
  exit 0

Tnx to Brain N1URO
http://n1uro.ampr.org/

I made a small addition to the script myself. Now I can also see how long fbb has been running and when fbb has been started. (just fun )

#! /bin/sh

. /lib/lsb/init-functions

MYFBB=`ps ax|grep fbb|grep xfbbd|grep sbin|awk '{ print $1 }'`
PID=`ps ax|grep fbb|grep xfbbd|grep sbin|awk '{ print $1 }'`
UPTIME=`ps -p $PID -o %t | tail -1|awk '{ print $1 }'`
START=`ps -p $PID -o lstart=`

if [ -z $MYFBB ]
  then
   log_warning_msg "FBB BBS not found running"
   sleep 2
   log_action_msg "Reloading FBB... "
   sleep 2
   /usr/local/sbin/fbb -s -a
   log_daemon_msg "FBB Reloaded" "done"
   log_end_msg 0

exit 1
fi
  log_action_msg "FBB BBS PI8LAP is running on pid : $PID"
  log_action_msg "FBB BBS PI8LAP is Started on : $START"
  log_action_msg "FBB BBS PI8LAP is running for : $UPTIME dd:hh:mm:ss"
exit 0

Looks like this.

root@pi1lap-base:/usr/local/etc/ax25/fbb# ./fbbcheck
[info] FBB BBS PI8LAP is running on pid : 2573.
[info] FBB BBS PI8LAP is Started on : Sat Sep  2 06:23:02 2017.
[info] FBB BBS PI8LAP is running for : 01:10:44 dd:hh:mm:ss.
root@pi1lap-base:/usr/local/etc/ax25/fbb#

Examples forward JNOS/BPQ/LinFBB

Here below some examples how the configuration of the forward in different systems works.

Thanks in particular to Bob (VE3TOK) and Gus (I0OJJ) for example configs !

Copyright ©  http://www.langelaar.net/jnos2/

Example Configuration for JNOS 2.0k side
   ----------------------------------------

      a) autoexec.nos

         # regular listener (no IAC) for remote JNOS and BPQ systems
         start telnet

         # another listener (IAC) on different port for LINFBB and OBCM systems
         start telnet 6300 iac

         # for winlink secure login, you have to configure your callsign
         mbox winlinkcall ve4klm

      b) spool/forward.bbs

         -------
         ve3tok
         # Here we are talking to a remote LINFBB system
         telnet 44.x.y.z 6300 iac
         +Callsign :
         .ve4klm
         +Password :
         .BLAHBLAHBLAH
         ve3tok
         -------
         va3tok
         # Here we are talking to a remote BPQ system
         telnet 44.x.y.z 8011 cronly
         .ve4klm
         .BLAHBLAHBLAH
         +BPQ
         .BPQBBS
         va3tok
         -------
         wl2k
         # Here we are talking to Winlink CMS server
         telnet winlink.org 8772 cronly
         +Callsign :
         ..VE4KLM
         +Password :
         .BLAHBLAH
         wl2k
         -------
         i0ojj 0023 P
         # Here we are talking to obcm v1.07b12
         # NOTE : OBCM supports FC proposal, so it will use B2F, but wonder if
         # I should force a B1F response so RLINE and Headers work properly ?
         telnet 44.x.y.z 4719 iac
         @10
         +login:
         .ve4klm
         @10
         +password:
         .BLAHBLAH
         @10
         <areas to forward>
         -------
         ir0aab 0023 P
         # Here we are talking to linfbb v7.0.8-beta2
         telnet 44.x.y.z 6300 iac
         @
         +Callsign :
         .ve4klm
         +Password :
         .BLAHBLAH
         @
         <areas to forward>
         -------

      c) setting up MY winlink authentication

         cd /jnos

         mkdir users		* you only need to do this one time

         ./jnospwmgr -a <callsign> -w

         it will ask you to enter the phrase that you would have received
         from your winlink notice (the challenge/response phrase).         

       * for now please read release notes (search December 8) for more info.

   Remote LINFBB host
   ------------------

     For forwarding to VE4KLM I added the following line to 'bbs.sys' :

       < FWD\VE4KLM

     A forward file for that particular bbs is placed in FBB's 'fwd' directory,
     so an example of forward file, 've4klm' (contents might be different for
     other FBB owners.)

       A VE4KLM

         P A
         C C ve4klm ve4klm.ampr.org 6300
         V login$Wpassword$W

       #  Forward file -- To VE4KLM BBS (JNOS)
       #
       #  Personal mail
       #
       B VE4KLM
       F VE4KLM
       #
       # Reverse fowarding to take place
       R
       # Forward rest of North-America to VE4KLM
       H  VE4KLM.#WPG.MB.CAN.NOAM
       H *.NOAM
       #

   Remote BPQ host
   ---------------

     This is needed as telnet connect script for bpq in forwarding with jnos.
     It is entered in the "connect script" box of the forwarding config web
     page of the bpq mail server.

       TIMES 0000-2359
       Idletime 60
       attach 3
       c ve4klm.ampr.org 23 NEEDLF .login pass

     General:

       attach p - p is a port number cfg'd as telnet port in your bpq32.cfg

       c Hostname TCPport [NEEDLF] User Password [Command]

     Here :

       attached 3 - I configured port 3 as telnet port
       NEEDLF     - Causes a Line Feed to be sent after user and password.
       .login     - The period before the login user name will tell jnos to use
                    a transparent TCP session instead of ordinary telnet.

     See: http://www.cantab.net/users/john.wiseman/Documents/TelnetServer.htm

     This example line below is needed in bpq32.cfg so that jnos can login into
     bpq and initiate forwarding as bbs.
 
       USER=ve4klm,password,login,BBS

   Remote OBCM host
   ----------------

     ; From obcm v1.07b12
     ;
     ; INIT IR0RM file (JNOS-2.0k+)
     ;          0                  1                  2
     ;          012345678901234567890123
     IR0RM PPPPPPPPPPPPPPPPPPPPPPPP TELNET:44.x.y.z:6300
      -d -k -l -o -u
     ;

   Remote LINFBB host
   ------------------

     # From linfbb v7.0.8-beta2
     #
     IF H 00-23
      S connected failure busy
      C C IR0RM-1 44.x.y.z 6300
      V i0ojj$Wpassword$W
     ENDIF
     #


Start DXSpider bij het booten

Om DXSpider te starten bij het booten, moet er wat aangepast worden in de /etc/inittab.
Eerst moet onder staan de regel worden uitgeschakeld, hier kan simpel een # voor.

1:2345:respawn:/sbin/getty 38400 tty1
2:23:respawn:/sbin/getty 38400 tty2
3:23:respawn:/sbin/getty 38400 tty3
4:23:respawn:/sbin/getty 38400 tty4
5:23:respawn:/sbin/getty 38400 tty5
#6:23:respawn:/sbin/getty 38400 tty6

We gebruiken tty6 voor DXSpider, dus deze moet worden uitgeschakeld.
Nu kunnen we de onderstaande regel toevoegen aan de /etc/inittab

##Start DXSpider on bootup and respawn it should it crash
DX:2345:respawn:/bin/su -c "/usr/bin/perl -w /spider/perl/cluster.pl" sysop >/dev/tty6

Start Jnos on bootup

To start Jnos when booting, you have to adjust something in the /etc/inittab.
First the line “#2:23:respawn:/sbin/getty 38400 tty2” must be switched off , a simple # can be used.

1:2345:respawn:/sbin/getty 38400 tty1
#2:23:respawn:/sbin/getty 38400 tty2
3:23:respawn:/sbin/getty 38400 tty3
4:23:respawn:/sbin/getty 38400 tty4
5:23:respawn:/sbin/getty 38400 tty5
6:23:respawn:/sbin/getty 38400 tty6

We use tty2 for Jnos, so it must be disabled.
Now we can add the line below to the /etc/inittab

#Startnos
#Start Jnos on BOOT en herstart het wanneer het kapot gaat.
JNOS:2345:respawn:/home/pd2lt/jnos/startnos </dev/tty2>/dev/tty2 2>&1

Start file for Jnos

cd /home/pd2lt/jnos
rm -f /home/pd2lt/jnos/spool/mqueue/*.lck 2> /dev/null
rm -f /home/pd2lt/jnos/jnos/spool/mail/*.lck 2> /dev/null
sleep 1
TZ='Europe/Amsterdam'; export TZ
export TERM=linux
exec ./jnos -C -g2 -u3 -f nos.cfg -i

Now Jnos is automatically started with every reboot of the system.


F6fbb port.sys (smtp/pop/nntp)

With f6fbb it is possible to use the software as smtp, pop and nntp server. Below is a small example of how you can make that possible.

# /usr/local/etc/ax25/fbb/port.sys
# FBB 7.07
#
#
# Number of Com Ports and TNCs (not) including TNC 0
             2            2
#
# Interface 6 = Windows
# Interface 7 = TCPIP
# Interface 8 = TFWin.dll
# Interface 9 = LINUX
#
#Com Interface Adress (Hex)   Baud
  2    9        189C               0
  3    9        189D:189E:77       0
#TNC NbCh Com MultCh   Pacln Maxfr NbFwd MxBloc M/P-Fwd  Mode  Freq
  0   0    0   0        0     0     0     0      00/01   ----  File-fwd.
  1   10   2   0        250   2     4     10     00/60   TUWY  Telnet
  2   4    3   0        250   2     4     10     00/10   SU    Pop/smtp
#
# End of file.
#

If you look at the HEX addresses, the smpt port on 6302 and the pop port on 6301 the nntp port just on 119. Now it is possible to set your mail program and read your mail in your mail package.

Email address comes with one with your packet address (pd9q@pi8lap.#zl.nld.euro)

Installing BPQ on the Raspberry Pi and TNC-Pi or Beaglebone Black and TNC-Black

Willem AC0KQ heeft een grafische bpq-config programmaatje schreven. Hier onder de uitleg.
(bron http://www.prinmath.com/ham/bpqHOWTO.htm)

Tevens is er een Quickstart guide http://www.prinmath.com/ham/howto/quickstart/

Het perl script wat Willem AC0KQ heeft geschreven http://www.prinmath.com/ham/bpq-config

Willem A. Schreüder AC0KQ

The purpose of this HOWTO is to describe how to install BPQ on a Linux Single
Board Computer (SBC) such as the Raspberry Pi or Beaglebone Black.

BPQ is a very sophisticated NET/ROM compatible packet switch written by John
Wiseman G8BPQ. BPQ can be configured to be a sophisticated Packet BBS, a
WinLink2000 RMS gateway, an APRS iGate, or any combination of these.

One of the hurdles to setting up BPQ is that the configuration file can be
rather difficult to set up. To ease this, this HOWTO uses a program named
bpq-config which makes it easy to create the initial configuration.
While bpq-config is primarily intended to create the initial
configuration file which you can then modify, it is actually capable of creating
a fairly sophisticated configuration file using a menu-driven interface.

Much more detail about BPQ are provided at
G8BPQ Home Page

At this time bpq-config only supports the Raspberry Pi and Beagle Bone
Black with John Hansen’s TNC-Pi and TNC-Black. This is because these are fairly
predictable environments. However, with little modification bpq-config
can also be used with other systems.

If you have any corrections or comments about this HOWTO or bpq-config, please
email me. I get lots of junk mail, so
add BPQ to the subject line to get it by my spam filters.

Authorization

If you want to use BPQ as an RMS gateway to WinLink, you need to obtain authorization from the WinLink folks. See this link on how to do that.

To send APRS position reports to the APRS-IS via the APRS Tier 2 Network a
password is required. However, bpq-config contains a function to
generate that password for you, so no additional authorization is required.

Computer Hardware

The Raspberry Pi and Beaglebone Black are available from numerous sources. The
price for a Raspberry Pi 2 or 3 is $35 from mail order vendors such as
MCM Electronics.

The Raspberry Pi B or B+ is sufficiently fast to run BPQ, so you can use that if
you happen to have one. The TNC-Pi works with all of these models.

The Raspberry Pi has the advantage of a very active user community, which makes
it the best supported device. The disadvantage of the Raspberry Pi is that it
has only one serial port, so if you want to use more than one TNC you need to
use the I2C bus to address the TNCs, which requires a bit more work.

The Beaglebone Black is has a street price around $50. It has the advantage of
a more mechanically stable mounting arrangement and four serial ports which
makes multiple TNC easy to mount and use.

The disadvantage of the Beagle Bone black is that it is not as well supported as
the Raspberry Pi so getting it configured is a bit more work.

TNC Hardware
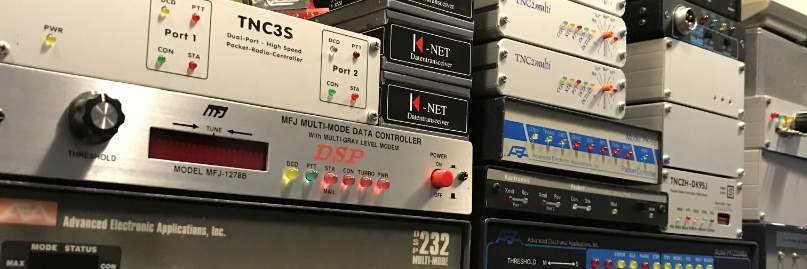
  • The TNC-Pi is available at Coastal Chipworks
    either built or as a kit. Get the kit, it is easy to build and lots of fun.
    The instructions are almost as good as the old Heathkit manuals.
  • For most locations you need some sort of enclosure. I use the Bud
    Industries Pi Sandwitch which allows the Raspberry Pi and TNC Pi pair to be
    mounted.
  • The rPi runs on 5V, so for a 12V system you need a converter to supply 5V
    at 1A continuously. The 7805 style regulators generate a lot of heat at that
    current so I use the Murata 78SRH-5/2-C instead, which will work for input
    voltages from 8-32V DC. I use a right angle Micro USB cable which I cut to
    wire for power. If the cable uses standard color codes, white and red are data
    which you can ignore, red and black are positive and negative.
  • The rPi needs an SD card to store the software. The Model B uses a
    standard size SD, the Model B+ uses the Micro SD format. A high speed and
    reliable card is critical, so getting a 16GB Class 10 card is recommended. The
    bigger card should last longer since the wear is spread over a larger space.
    Get a spare since the cards do wear out eventually.

    Configuring the OS

    Raspbian switch to systemd starting with jessie (Debian 8). These instructions will work
    only with this latest version of Raspbian. For older versions see
    these instructions.

    • Download Raspbian which is
      Debian for the Raspberry Pi. There are several other OS versions, but this one is my
      choice as a pretty vanilla Linux distro. Unzip the image from the ZIP file and follow

      these instructions
      to burn the image to the SD card.
    • Insert the card into the Pi and boot it. You can either
      • Connect a keyboard and monitor and log in directly.
      • Connect the pi to a network running DHCP and ssh into it. The hostname willshow up as RASPBERRY in the DHCP leases on your router.
    • Log in to the computer using user name pi and password raspberry.
    • Run sudo raspi-config
      • Expand Filesystem
      • Change User Password
      • Internationalisation (set time zone)
      • Advanced options (hostname)
    • Install new packages
      • sudo apt-get install vim telnet minicom i2c-tools libpcap0.8
    • Add new user with administrative privilidges
      • sudo adduser username
      • sudo adduser username sudo
    • Free up the serial line the TNC-Pi will use.
      • sudo systemctl mask serial-getty@ttyAMA0.service
    • Reboot the system to make sure the serial line is released.
      • sudo reboot

    Install and configure BPQ

    • Log in using the new user created above.
    • Create the BPQ sub-directory
      • mkdir BPQ
      • cd BPQ
    • Download bpq-config, make it executable and run it
      • wget http://www.prinmath.com/ham/bpq-config
      • chmod a+x bpq-config
      • sudo ./getbpq
    • bpq-config is menu-driven, so just follow the menus.Generally you would do the following things.
      1. Download the BPQ software.
      2. Configure BPQ
        1. Configure the node.
        2. Configure one or more ports.
        3. Configure one or more telnet users.
        4. Optionally add one or more AXIP node maps.
        5. Write the configuration.
      3. Start BPQ and test it.
      4. Set BPQ to automatically start on boot.

    Using BPQ

    • Connect to BPQ using your web browser by typing inhttp://X.X.X.X:8008/on the URL bar, where X.X.X.X is the IP address of your BPQ node
    • You can connect to BPQ node from any computer on the LAN usingtelnet X.X.X.X 8010
  • Log in using your BPQ user name and password set for the Telnet user.

Linux Iptables Blok een compleet land.

Hier onder een iptables script wat het mogelijk maakt om hele landen te blokken.
Op http://www.ipdeny.com/ipblocks/data/countries staan de landen files die je kunt gebruiken.

#!/bin/bash
# Purpose: Block all traffic from AFGHANISTAN (af) and CHINA (CN). Use ISO code. #
# See url for more info - http://www.cyberciti.biz/faq/?p=3402
# Author: nixCraft <www.cyberciti.biz> under GPL v.2.0+
# -------------------------------------------------------------------------------
ISO="af cn" 
 
### Set PATH ###
IPT=/sbin/iptables
WGET=/usr/bin/wget
EGREP=/bin/egrep
 
### No editing below ###
SPAMLIST="countrydrop"
ZONEROOT="/root/iptables"
DLROOT="http://www.ipdeny.com/ipblocks/data/countries"
 
cleanOldRules(){
$IPT -F
$IPT -X
$IPT -t nat -F
$IPT -t nat -X
$IPT -t mangle -F
$IPT -t mangle -X
$IPT -P INPUT ACCEPT
$IPT -P OUTPUT ACCEPT
$IPT -P FORWARD ACCEPT
}
 
# create a dir
[ ! -d $ZONEROOT ] && /bin/mkdir -p $ZONEROOT
 
# clean old rules
cleanOldRules
 
# create a new iptables list
$IPT -N $SPAMLIST
 
for c  in $ISO
do 
	# local zone file
	tDB=$ZONEROOT/$c.zone
 
	# get fresh zone file
	$WGET -O $tDB $DLROOT/$c.zone
 
	# country specific log message
	SPAMDROPMSG="$c Country Drop"
 
	# get 
	BADIPS=$(egrep -v "^#|^$" $tDB)
	for ipblock in $BADIPS
	do
	   $IPT -A $SPAMLIST -s $ipblock -j LOG --log-prefix "$SPAMDROPMSG"
	   $IPT -A $SPAMLIST -s $ipblock -j DROP
	done
done
 
# Drop everything 
$IPT -I INPUT -j $SPAMLIST
$IPT -I OUTPUT -j $SPAMLIST
$IPT -I FORWARD -j $SPAMLIST
 
# call your other iptable script
# /path/to/other/iptables.sh
 
exit 0

Installeer DxSpider op Debian Wheezy

# Install Dx-Cluster

sudo apt-get install wget
sudo apt-get install git-core
sudo groupadd spider
sudo useradd -m sysop -G spider
sudo usermod -g spider sysop
sudo passwd sysop
sudo adduser sysop sudo

# Perl modules
sudo apt-get install libtimedate-perl
sudo apt-get install libnet-telnet-perl
sudo apt-get install libcurses-perl
sudo apt-get install libdigest-sha-perl
sudo apt-get install libdata-dumper-simple-perl

sudo su
cd ~sysop
ln -s /home/sysop/spider /spider
shutdown -r now

After restart login as sysop
cd ~
mkdir spider
git clone git://scm.dxcluster.org/scm/spider spider.new
cp -a /home/sysop/spider.new/.git /spider
rm -rf spider.new
cd /spider
git reset –hard
sudo su
cd /home/sysop/
chown -R sysop.spider spider
find . -type d -exec chmod 2775 {} ;
find . -type f -exec chmod 775 {} ;
exit
cd /spider
mkdir local
mkdir local_cmd
cp perl/DXVars.pm.issue local/DXVars.pm
cp perl/Listeners.pm local/Listeners.pm
cd local
mc
– edit DXVars.pm following the instructions in the comments
– edit Listeners.pm to remove “#” from the line for the port, and add additional ports as needed:
@listen = (
[“0.0.0.0”, 7300],
);

cd /spider/perl/
./create_sysop.pl
cd /tmp
wget http://ftp.w1nr.net/usdbraw.gz
# The next step can take a few minutes
/spider/perl/create_usdb.pl /tmp/usdbraw.gz
cd /spider/src
make
cd /spider/perl
./cluster.pl
# on a separate ssh or system console, log into the system as sysop
/spider/perl/console.pl
# from the command line of the console enter:
load/usdb # US database ?

# Edit /etc/inittab to add the following two lines at the end of the file.
##Start DXSpider on bootup and respawn it should it crash
DX:2345:respawn:/bin/su -c “/usr/bin/perl -w /spider/perl/cluster.pl” sysop >/dev/tty6

Add a line to /etc/services and /etc/inetd.conf for spider
/etc/services

# Local services
bpqspider 7400/tcp # BPQ to Spider Link

/etc/inetd.conf

sudo apt-get install openbsd-inetd

bpqspider stream tcp nowait sysop /spider/src/client client login ax25

Restart inetd – sudo killall -1 inetd