Direwolf and Jnos

#!/bin/bash
# 6 march 2018
# Wrote a small script to get the shittie PTS to a file where its belongs.
# Yes you can also use the agw driver from Direwolf for Jnos.
# Now its also possible to "sed" the right PTS to your ax25 start file
#
# socat -d -d -lf /tmp/socat.pts PTY,link=/tmp/kisstnc TCP4:127.0.0.1:8001 &
# sleep 2
# grep -o "/dev/pts/." /tmp/socat.pts > /tmp/devs.pts
# attachthem () {
# read PTS1
# sed -i "s,kissattach -m 256 /dev/.*$,kissattach -m 256 $PTS1 ax0 44.137.31.73," /etc/ax25/ax-start
#
# }
#
# tail -n 1 /tmp/devs.pts | attachthem
# rm /tmp/socat.pts
# rm /tmp/devs.pts
# sleep 3
#
# Or use it with (X)net.
# sed -i "s,attach sdev4 kiss 4 1 19200 /dev/.*$,attach sdev4 kiss 4 1 19200 $PTS1," /usr/local/xnet/AUTOBOOT.NET
#
# Or with BPQ
# sed -i "s,COMPORT=/dev/.*$,COMPORT=$PTS1," /usr/local/linbpq/bpq32.cfg
#
# Oo well maybe work this better
# IPADDR=127.0.0.1
# TCPPORT=8001
#
# Yes there are many way`s to do this, but i had some fun to play with it.
# Maybe it is useful for someone.
#################################################################################################

The scipt…. Small but work quit well

#!/bin/bash
echo "Starting direwolf with socat for jnos/ax25"
# Set the path to direwolf and some stuff
PATH=/direwolf:/usr/bin:/bin:/usr/local/bin
# Start Direwolf
direwolf -c /direwolf/direwolf.conf &> /var/log/direwolf.log >/dev/tty3 &
sleep 3
# Socat kisstnc link with a PTS
socat -d -d -lf /tmp/socat.pts PTY,link=/tmp/kisstnc TCP4:127.0.0.1:8001 &
sleep 2
grep -o "/dev/pts/." /tmp/socat.pts > /home/pd2lt/jnos/spool/ptmx_radio.cfg
echo "Direwolf is connect to" `cat /home/pd2lt/jnos/spool/ptmx_radio.cfg`
echo "Now Jnos is ready to Rock and Roll :)"
rm /tmp/socat.pts
# Dont delete ptmx_radio.cfg before starting Jnos
rm /home/pd2lt/jnos/spool/ptmx_radio.cfg
sleep 1

This is what i found in the change.log of Jnos

Better support for PTY98 (/dev/ptmx, /dev/pts/N) pseudo devices. Bob (VE3TOK)
   asked for this a long time ago, so I figured I better get it implemented.

   Note : Technically one can use the new jnos 'attach baycom' and go direct to
   a kernel KISS type interface, meaning you don't need to run an intermediary
   program (kissattach or net2kiss) anymore. Try it, let me know how it works.

   COMPILE : Make sure '#define JNOSPTY98' exists in your config.h file.

   The best way for me to show how this feature works is by example. One way of
   getting JNOS to use a linux AX25 device is through the 'kissattach' program,
   but get the one from F6BVP (it has a mod that actually outputs the name of
   the slave device after you run the program). The stock ax25 utilities will
   not tell you that (you have to look for a new /dev/pts/N to appear then).

      kissattach /dev/ptmx radio > /jnos/spool/ptmx_radio.cfg

   The issue here is you don't know what slave device you will get, it could
   change each time you run kissattach, there may be no consistent device name
   for you to depend on when running 'attach asy' in the JNOS autoexec.nos.

   Now in JNOS (autoexec.nos), suppose we have this entry below :

      attach asy ptmx_radio - ax25 ax0 4096 256 9600

   I have added a feature where if the 3rd argument starts with 'ptmx_', then
   JNOS will look for a corresponding *.cfg file, and extract the slave device
   name from it, and then attach using that instead of the original argument.

This is some monitor output of Direwolf.

Dire Wolf version 1.3

Reading config file /direwolf/direwolf.conf
Audio device for both receive and transmit: plughw:0,0 (channel 0)
Channel 0: 1200 baud, AFSK 1200 & 2200 Hz, E+, 44100 sample rate.
Ready to accept AGW client application 0 on port 8000 …
Use -p command line option to enable KISS pseudo terminal.
Ready to accept KISS client application on port 8001 …

Connected to KISS client application …

[0L] PD2LT-2>NODES:<0xfe>
[0L] PD2LT-9>NODES:<0xff>LAPNOS
[0L] PD2LT-9>NODES:<0xfe>LAPNOS

PD2LT-2 audio level = 14(3/3) [NONE] |||||||__
[0.3] PD2LT-2>NODES:<0xfe>

PD2LT-9 audio level = 14(3/3) [NONE] ||||||||_
[0.3] PD2LT-9>NODES:<0xff>LAPNOS
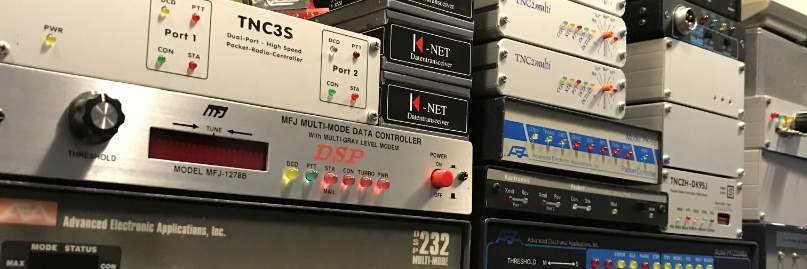
sexy ifconfig

ax0 voor link fbb
ax1 voor link Convers
eth0 Dit is de Baas
sl0 voor (X)net
tun0 voor Jnos
tunl0 voor ampr Gateway

Om te zorgen dat de data gaat lopen hebben we een aantal ip routes nodig.

ip route add 44.137.31.70 dev sl0 table 44 src 44.137.31.69
ip route add 44.137.31.67 dev tun0 table 44 src 44.137.31.82

En voor de iptables firewall
$ipt -A FORWARD -i tunl0 -o sl0 -j ACCEPT
$ipt -A FORWARD -i sl0 -o tunl0 -j ACCEPT
$ipt -A FORWARD -i tunl0 -o tun0 -j ACCEPT
$ipt -A FORWARD -i tun0 -o tunl0 -j ACCEPT

Met deze bovenstaande regels heeft iedereen toegang tot sl0 en tun0

Xnet axudp link Jnos

The axudp link from xnet to jnos has caused a lot of problems.
But he is up and running … Here the explanation.

In the line “attach axudp xnet 256 192.168.1.112” (jnos) is the secret.
This must therefore “not” refer to the ip address of xnet like you
have indicated in ip.net at myip, but to the IP address of Linux itself.
So the ip address of (for example) eth0

Autoexec.nos (Jnos)

attach tun tun0 1500 0
#
ifconfig tun0 ipaddress 192.168.1.222
ifconfig tun0 netmask 255.255.255.0
ifconfig tun0 mtu 1500

shell ifconfig tun0 192.168.1.221 pointopoint 192.168.1.222 mtu 1500 up
pause 2
shell echo 1 >/proc/sys/net/ipv4/ip_forward
shell /usr/sbin/arp -i eth0 -Ds 192.168.1.222 eth0 pub

attach axudp xnet 256 192.168.1.112 (ip-adres Linux (eth0))
ifconfig xnet description "axip link xnet"

Eth0 (Linux)

eth0      Link encap:Ethernet  HWaddr 00:12:3f:2b:c6:6f
          inet addr:192.168.1.112  Bcast:192.168.1.255  Mask:255.255.255.0
          inet6 addr: fe80::212:3fff:fe2b:c66f/64 Scope:Link
          UP BROADCAST RUNNING MULTICAST  MTU:1500  Metric:1
          RX packets:7844 errors:0 dropped:0 overruns:0 frame:0
          TX packets:7255 errors:0 dropped:0 overruns:0 carrier:0
          collisions:0 txqueuelen:1000
          RX bytes:885500 (864.7 KiB)  TX bytes:1166950 (1.1 MiB)
          Interrupt:16

Ip.net (xnet)

IP.net
#        File: IP.NET
#       (X)Net IP Address
#
myip 192.168.1.201
subnet 192.168.1.0/24
#
# ARP entry for all received IP Frames
arp add 192.168.1.201 slip sdev6
#
#
# Default route
ipr add default SLIP 192.168.1.201
#
iproute add 192.168.1.0/24 slip 192.168.1.201

Autoboot.net (xnet)

attach IP0 axudp 0 1 192.168.1.222   (Ip-adres van Jnos) 

po 0 acon 1
po 0 baud 9600
po 0 dup 0
po 0 win 7
po 0 quality 0
po 0 name pd2lt
r bc ad 0 pd2lt
r bc ad 0 nodes
ro lo a 0 pd2lt-9 d


(X)Net IP.NET

A small example of IP.NET from (X) Net

#
# Default route
ipr add default SLIP 192.168.1.201
#
iproute add 192.168.1.200/24 slip 192.168.1.201
#
### Set route naar Bbs en Convers
route local add 4 pi8lap-8 nd lapcon
route local add 3 pi8lap nd lapbbs
#
#### Start services
start tcpd
#### Start telnet server (zie file teluser.net)
start telnetd
#### Start httpd (index.htm)
start httpd
#### Start de ftp server (zie file ftpuser.net)
start ftpd
#### Start statd
start rstatd 192.168.1.112
start statd
start statd 60 		min.sta
start statd 3600 	hour.sta
start statd 86400 	day.sta

(X)Net Crontab

Here a small example of the crontab of (X) Net

# -------    ------------
# Minuten      0-59
# Uren         0-23
# Dagen        1-31 Dagen van de maand
# Maanden      1-12
# Weekdagen    0-6 (Zondag = 0, Maandag = 1, etc...)

# 30 4 1,15 * 5 msg all Goedemiddag allemaal
# Wordt om 4.30 uur op de 1e en de 15e van de maand en op elke vrijdag uitgevoerd.

# Minuten	uren	dagen	maanden	weekdagen	WAT	Text
# Gelukkig nieuwjaar wensen.
   0 		0 	1 	1 	* 		msg all Iedereen een gelukkig Nieuwjaar!
# Ronde van PI4Z begint zo
   55		11	*	*	0		msg all	Ronde van PI4Z begint over 5 minuten.
   55		11	*	*	0		fbeacon pi4z.txt 0 BEACON
   54		11	*	*	0		fbeacon pi4z.txt 1 BEACON
# Backup autoexec/autoboot 1 keer per dag
   0		0	*	*	0,1,2,3,4,5,6	cp autoexec.net /usr/local/xnet/backup/autoexec.res
   0		0	*	*	0,1,2,3,4,5,6	cp autoboot.net /usr/local/xnet/backup/autoboot.res
# Extra Beacon
   0,15,30,45 	* 	* 	* 	* 		fbeacon beacon.txt 0 BEACON
   1,16,31,46	*	*	*	*		fbeacon beacon.txt 1 BEACON
#

(X)Net autoexec.net


#### Hier worden de services gestart ####
#
#### Start the router
start routed
#### Start beacond
start beacond
#### Ping-Pong convers
#start conversd pi1lap-4
#### ONLINE-PortStatistieks
start postatd
pos * # port statistieks voor alle poorten
#### Start crond zie file crontab
start crond
#### CALL-Check starten / Zie file callchk.net - suspend.txt
start callchkd 100
# Name server - Router
names 192.168.1.1
# Time server
ntpdate 217.77.132.1
#### Beacons pi1lap
BEACON A 600 0 ID text PI1LAP:xn_lap - ((X)NET) Ax25 - Net/ROM node.
BEACON A 600 1 ID text PI1LAP:xn_lap - ((X)NET) Ax25 - Net/ROM node.
#
my call pi1lap
my alias xn_lap
my tcall pd2lt
my prompt pi1lap ==>

(X)Net autoboot.net


#### Autoboot.net Hier komen de attach commandos. ####

#### Ax25 kiss poorten
attach sdev0 kiss 0 1 9600 /dev/ttyUSB0 # 2m
attach sdev1 kiss 1 1 9600 /dev/ttyUSB1 # 70cm
#attach sdev2 kiss 2 1 9600 /dev/ttyUSB2 # hf
attach sdev3 kiss 3 1 115200 /dev/pts/2
attach sdev4 kiss 4 1 115200 /dev/pts/4
#attach sdev5 kiss 5 1 19200 /dev/com8  # Cluster
#### AXIP - Ports
# Link pi1lap
#attach ip0 axudp 0 1 l10093 d93 (ip-adres link local)
# Link pi1dxc-15
attach ip0 axudp 6 1 l93 d93 (ip-adres pi1dxc)
# Link pi1snk
attach ip1 axudp 7 1  l93 d93 (ip-adres pi1snk)
# Link pi1dec-14
attach ip2 axudp 8 1 l93 d10093 (ip-adres pi1dec)
# Link pi1bdg
attach ip3 axudp 9 1 l93 d10093 (ip-adres pi1bdg)
# Link pi1cdr
attach ip4 axudp 10 1 l93 d93 (ip-adres pi1cdr)
#
#### Slip port
attach sdev6 slip 38400 /dev/pts/6

#po 0 baud 115200
#po 0 dup 0
#po 0 win 7
#po 0 quality 255
#po 0 name pi1lap
#r bc ad 0 pi1lap
#r bc ad 0 nodes

#### 2m
po 0 acon 1 
po 0 baud 1200
po 0 dup 0
po 0 win 4
po 0 dama 0
po 0 quality 192
po 0 name 2m-1k2
#r bc ad 0 pe1plm-14
#r bc ad 0 nodes
#### 70cm
po 1 acon 1
po 1 baud 1200
po 1 dup 0
po 1 win 4
po 1 dama 0
po 1 quality 192
po 1 name 70cm-1k2
#r bc ad 1 pe1plm-14
#r bc ad 1 nodes
#### HF
#po 2 baud 9600
#po 2 dup 1
#po 2 win 2
#po 2 quality 0
#po 2 name hf
#### F6fbb bbs
po 3 baud 115200
po 3 dup 0
po 3 win 4
po 3 name pi8lap
#### Convers
#po 4 acon 1
po 4 baud 115200
po 4 dup 0
po 4 win 4
po 4 name pi8lap-8
#r bc ad 1 pi1lap-15
#r bc ad 1 nodes
#### Cluster
#po 5 baud 19200
#po 5 dup 1
#po 5 win 7
#po 5 name Cluster
#### ip0 Link pi1dxc-15
po 6 baud 76800
po 6 dup 0
po 6 win 7
#po 6 quality 255
po 6 name pi1dxc-15
r f add 6 pi1dxc-15
r bc ad 6 pi1dxc-15
r bc ad 6 nodes
#### ip1 Link pi1snk
po 7 baud 76800
po 7 dup 0
po 7 win 7
#po 7 quality 255
po 7 name pi1snk
r bc ad 7 pi1snk
r bc ad 7 nodes
#### ip2 Link pi1dec-14
po 8 baud 76800
po 8 dup 0
po 8 win 7
#po 8 quality 255
po 8 name pi1dec-14
r bc ad 8 pi1dec-14
r bc ad 8 nodes
#### ip3 Link pi1bdg
po 9 baud 76800
po 9 dup 0
po 9 win 7
#po 9 quality 255
po 9 name pi1bdg
r bc ad 9 pi1bdg
r bc ad 9 nodes
#### ip4 Link pi1cdr
po 10 baud 38400
po 10 dup 0
po 10 win 7
po 10 quality 255
po 10 name pi1cdr
r bc ad 10 pi1cdr
r bc ad 10 nodes

Start (X)Net/kissattach/slip at boot

I have written the startup script below so that all services are started. Now of course it is nice if this also happens when booting the server. First the start script.

#!/bin/sh
#
tmpfile="/tmp/$$.startax0.pts"
#
kissnetd -p 2 > "$tmpfile" &
#
sleep 2
#
attachthem () {
        read PTS1 PTS2
        echo "Starting PTS gekloot voor poort AX0 :)"
        kissattach -l $PTS1 ax0 192.168.1.113
	ifconfig ax0 netmask 255.255.255.0
        sleep 1
        sed -i "s,attach sdev3 kiss 3 1 115200 /dev/.*$,attach sdev3 kiss 3 1 115200 $PTS2," /usr/local/xnet/AUTOBOOT.NET
}

tail -n 1 $tmpfile | attachthem
rm $tmpfile
#
tmpfile="/tmp/$$.startax1.pts"
#
kissnetd -p 2 > "$tmpfile" &
#
sleep 2

attachthem () {
	read PTS1 PTS2
	echo "Starting PTS gekloot voor poort AX1 :)"
        kissattach -l $PTS1 ax1 192.168.1.113
        ifconfig ax1 netmask 255.255.255.0
        sleep 1
        sed -i "s,attach sdev4 kiss 4 1 115200 /dev/.*$,attach sdev4 kiss 4 1 115200 $PTS2," /usr/local/xnet/AUTOBOOT.NET
}

tail -n 1 $tmpfile | attachthem
rm $tmpfile
################## Klote slip link ###################################
XNET_DIR=/usr/local/xnet
LINIP=192.168.1.200     # LINUX-IP   address
XNET=192.168.1.201  # XNET  address
#
cd /usr/local/xnet
./dev &
#
sleep 2
#
attachthem () {
        read PTS1 PTS2
        echo "Starting PTS gekloot voor de slip link :)"
        slattach -s 38400 -p slip $PTS1 &
        sleep 1
        ifconfig sl0 $LINIP netmask 255.255.255.255 pointopoint $XNET mtu 236 up
        sleep 1
        sed -i "s,attach sdev6 slip 38400 /dev/.*$,attach sdev6 slip 38400 $PTS2," /usr/local/xnet/AUTOBOOT.NET
}

tail -n 1 /tmp/slip | attachthem
rm /tmp/slip

cd /usr/local/sbin
./ppconversd &
sleep 3
#
cd /usr/local/xnet
./rstatrxd /var/www/cgi-bin/postat/ &
sleep 2
#
  /sbin/modprobe netrom
  /usr/local/sbin/nrattach -i 192.168.1.113 -m 512 netrom
  /usr/local/sbin/nrattach -i 192.168.1.113 -m 512 netcon
  /usr/local/sbin/nrattach -i 192.168.1.113 -m 512 netbbs
# Init Netrom
   /usr/local/sbin/netromd -i -l -t 30
# Enable External Logons
  /usr/local/sbin/ax25d &
  /bin/sleep 2
# Start Mheard daemon
 /usr/local/sbin/mheardd
# start fbb
 /usr/local/sbin/fbb &
# Nu dan eindelijk Xnet
./linuxnet < /dev/tty2 > /dev/tty2 2>&1 &

Now I have created the following file in /etc/init.d with the name xnet.

#!/bin/sh
### BEGIN INIT INFO
# Provides:          xnet
# Required-Start: $remote_fs $syslog $network
# Required-Stop: $remote_fs $syslog $network
# Default-Start:     2 3 4 5
# Default-Stop:      0 1 6
# Short-Description: Run /usr/local/xnet/xnet if it exist
### END INIT INFO

PATH=/sbin:/usr/sbin:/bin:/usr/bin:/usr/local/sbin

. /lib/init/vars.sh
. /lib/lsb/init-functions

do_start() {
        if [ -x /usr/local/xnet/xnet ]; then
                [ "$VERBOSE" != no ] && log_begin_msg "Running pi1lap)"
                /usr/local/xnet/xnet
                ES=$?
                [ "$VERBOSE" != no ] && log_end_msg $ES
                return $ES
        fi
}

case "$1" in
    start)
        do_start
        ;;
    restart|reload|force-reload)
        echo "Error: argument '$1' not supported" >&2
        exit 3
        ;;
    stop)
        ;;
    *)
        echo "Usage: $0 start|stop" >&2
        exit 3
        ;;
esac

Now it has to be added.
update-rc.d xnet defaults
update-rc.d xnet enable

Well, reboot and see if everything is alright.