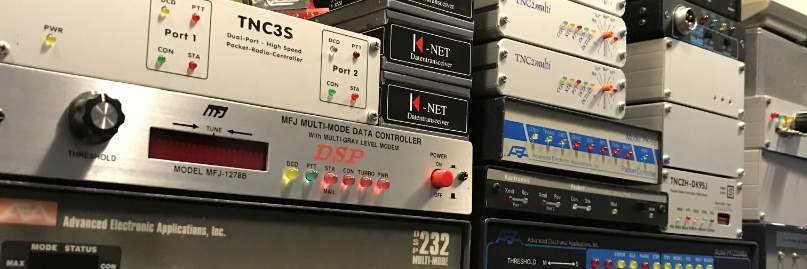
SCS Tracker Driver for BPQ32 switch

SCSTracker.dll

This driver allows BPQ32 applications to make and receive Robust Packet or HF Packet calls using the SCS Tracker TNC. This driver is intended for using the Tracker on HF for forwarding, and only allows one connect at a time. For normal VHF operation or user access on HF, there is a separate driver, SCSTrackerMulti, that supports multiple connections (but not scanning).

Although the Tracker is an ax.25 controller, the driver only allows it to be used by one session at a time, so you must use the ATTACH command to allocate the port before making a call. So if your Tracker port is BPQ32 port 3, enter

ATTACH 3

Possible responses are:

#BPQ11:GM8BPQ-2} Ok

#BPQ11:GM8BPQ-2} Error – Invalid Port   // Port is not a Tracker port.

#BPQ11:GM8BPQ-2} Error – Port in use   // Port is in use.

Once attached to a port, you can issue commands to the TNC. These are the same as you would use to control the Tracker from a terminal, except that you don’t type an ESC before each command.

You can also select which mode a connect will be made in be entering HFPACKET or RPACKET. So to make a Robust call, enter

ATT 3
RPACKET
C CALLSIGN

For a normal (300 Baud HF Packet) call enter:

ATT 3
HFPACKET
C CALLSIGN

Configuration.

The driver configuration is specified in the bpq32.cfg file

The driver is defined to BPQ32 as an External port, and needs some driver-specific configuration

The first line of the config defines what BPQ Application incoming calls should connect to. If omitted, calls go to the command handler.

If you are using the Rig Control feature for scanning, add the RIGCONTROL command next.

If you want to listen for both normal and Robust packet connects, use the SWITCHMODES n command. This specifes how long to spend in each mode. Note Rigcontrol will override this.

If you want users to be able to connect to any of your applications, use the USEAPPLCALLS command.

If you want the controller to start in Robust mode, and return to that mode after a connect, use DEFAULT ROBUST

All commands that are essential to run with BPQ32 are sent automatically. You only need to include any special setup you need.

The commands that are preset are in two groups. One set is sent before the commands you specify, so can be changed. The others are sent after your commands, as they are essential for correct operation with BPQ32.

Sent before your config

M UISC           ; Monitoring Enabled (needed for APPLCALL support)
%F 1500          ; Use the same centre frequency for normal and Robust packet.

Sent after your config

Z 0              ; No Flow Control
Y 1              ; One Channel
E 1              ; Echo - Restart process needs echo
%B R600 or %B 300 ; Depending if DEFAULT ROBUST is set

MYCALL is set to the PORT config PORTCALL if specified, otherwise to NODECALL. Any MYCALL in the config file is ignored.

Other possible configuraton parameters are:

FORCE ROBUST
Only use Robust Packet. Disable any switch to Normal Packet

WL2KREPORT
send Frequency info to the WINLINK database. See here for details.

UPDATEMAP
The modem logs connects to the Nodemap if you have specified a LOCATOR in your BPQ32.cfg. If you specify UPDATEMAP, stations heard will also be sent to the map.

BEACONAFTERSESSION
Send Beacon after each session

Sample SCS Trcker Configuration

PORT
 ID=Tracker
 COMPORT=1;             COM Port Address
 SPEED=38400;           COM Port Speed
 DRIVER=SCSTracker
 INTERLOCK=n;           ; Optional - set if you have two ports sharing the same radio.
                        ; Set the same Interlock value on both ports.
 
 CONFIG                 ; Driver-Specific Configuration
 
 APPL RMS               ; Autoconnect to BPQ32 RMS Application
 
 RIGCONTROL
 COM2 19200 ICOM IC700 70
 15,14.103,USB,F1,R2
 15,14.103,USB,F1,H1
 ****
 
 SWITCHMODES 15            ; Change between Robust and normal packet every 15 seconds.
                           ; Note this will be ignored if you are using RIGCONTROL
						   
 USEAPPLCALLS              ; Listen for calls to any of your APPLnCALLS
 DEFAULT ROBUST            ; Return to Robust mode after connections
 BEACONAFTERSESSION        ; Send Beacon after each session 

ENDPORT

© John Wiseman GM8BPQ/G8BPQ

SCS Tracker Multiconnect Driver for BPQ32 switch

TrkMulti.dll

This driver allows the SCS Tracker TNC to be used in Host Mode for user access to BPQ32 applications. The Tracker can be used in KISS mode for this purpose, but the Tracker’s dynamic parameter tuning works only in Host Mode. There is a separate driver, SCSTracker that supports scanning, but only a single connect at a time, primarily for use for BBS forwarding.

Configuration.

The driver configuration is specified in the bpq32.cfg file

The driver is defined to BPQ32 as an External port, and needs some driver-specific configuration

All commands that are essential to run with BPQ32 are sent automatically. You only need to include any special setup you need. Any Tracker Commands can be entered. The PACKETCHANNELS command is used to set the number of connects accepted (Default is 10)

The commands that are preset are in two groups. One set is sent before the commands you specify, so can be changed. The others are sent after your commands, as they are essential for correct operation with BPQ32

Sent before your config

M UISC           ; Monitoring Enabled
%F 1500          ; Use the same centre frequency for normal and Robust packet.
F 200            ; Sets SABM retry time to about 5 secs

Sent after your config

Y n              ; n is PACKETCHANNELS, Number of Streams
Z 0              ; No Flow Control
E 1              ; Echo - Restart process needs echo

MYCALL is set to NODECALL. Any MYCALL in the config file is ignored.

Sample SCS Tracker Multi Configuration.

PORT
 ID=Tracker Access Porr
 COMPORT=1;             COM Port Address
 SPEED=38400;           COM Port Speed
 DRIVER=TRKMULTI
 
 CONFIG                 ; Driver-Specific Configuration
 PACKETCHANNELS 5       ; Limit to 5 simultaneous connections 
 %F 2000                ; Set Normal Packet Centre to 2000 (Gives 500 Hz split beteeen Robust and Normal Packet)
 ENDPORT

© John Wiseman GM8BPQ/G8BPQ

New DoS

If you have not already seen it, experiences it, or read about it, working to head off another reflection DOS vector. This time it is memcached on port 11211 UDP & TCP. There are active exploits using these ports. Reflection attacks and the memcached is not new. We know how reflection attacks work (send a spoofed packet to a device and have it reflected back (yes please deploy source address validation and BCP 38).

Operators are asked to review their networks and consider updating their Exploitable Port Filters (Infrastructure ACLs) to track or block UDP/TCP port 11211 for all ingress and egress traffic. If you do not know about iACLs or Explorable port filters, you can use this white paper details and examples from peers on Exploitable Port Filters:

http://www.senki.org/operators-security-toolkit/filtering-exploitable-ports-and-minimizing-risk-to-and-from-your-customers/

Enterprises are also asked to update their iACLs, Exploitable Port Filters, and Firewalls to track or block UDP/TCP port 11211 for all ingress and egress traffic.

Deploying these filters will help protect your network, your organization, your customers, and the Internet.

This should help protect you if you add this to your firewall.

# new port 11211 DoS
/sbin/iptables -t filter -I INPUT -s 0.0.0.0/0 -p tcp --dport 11211 -j DROP
/sbin/iptables -t filter -I OUTPUT -s 0.0.0.0/0 -p tcp --dport 11211 -j DROP
/sbin/iptables -t filter -I FORWARD -s 0.0.0.0/0 -p tcp --dport 11211 -j DROP
/sbin/iptables -t filter -I INPUT -s 0.0.0.0/0 -p udp --dport 11211 -j DROP
/sbin/iptables -t filter -I OUTPUT -s 0.0.0.0/0 -p udp --dport 11211 -j DROP
/sbin/iptables -t filter -I FORWARD -s 0.0.0.0/0 -p udp --dport 11211 -j DROP


Fbb problem showing .HLP and .ENT file

Donnie WD1F has some trouble to get the english.hlp and the english.ent files to show up in fbb. He found the solution.

connecting from remote TNC...
cmd:c wd1f-7
*** CONNECTED to WD1F-7
S (H for help) >
rm
There are no such messages (message choice: *).
(1) WD1F BBS (H for help) >
H
{nothing happens}

All the files are there with the right permissions.

root@ks1r:/etc/ax25/fbb/lang# strace -e open -p 2457 
strace: Process 2457 attached 
open("/var/ax25/fbb/inf.sys", O_RDWR)   = 10 
open("/var/ax25/fbb/wp/wp.sys", O_RDWR) = 10 
open("/etc/ax25/fbb/lang/english.ent", O_RDONLY) = 10 
open("/etc/ax25/fbb/lang/english.hlp", O_RDONLY) = 10
Dir of /etc/ax25/fbb/lang
root@ks1r:/etc/ax25/fbb/lang# l 
total 248 
-rw-r--r-- 1 root root   179 Feb  6 11:29 english.ent 
-rw-r--r-- 1 root root   179 Feb  6 11:13 english.ent.sample 
-rw-r--r-- 1 root root 62459 Feb  6 11:13 english.hlp 
-rw-r--r-- 1 root root 62459 Feb  6 11:26 ENGLISH.hlp 
-rw-r--r-- 1 root root   743 Feb  6 11:13 english.inf 
-rw-r--r-- 1 root root 12428 Feb  6 11:13 english.txt 
-rw-r--r-- 1 root root 12428 Feb  6 11:26 ENGLISH.txt 
-rw-r--r-- 1 root root   155 Feb  6 11:13 francais.ent.sample 
-rw-r--r-- 1 root root 51417 Feb  6 11:13 francais.hlp 
-rw-r--r-- 1 root root   777 Feb  6 11:13 francais.inf 
-rw-r--r-- 1 root root 14783 Feb  6 11:13 francais.txt 
root@ks1r:/etc/ax25/fbb/lang#

I found my problem and it wasn’t easy. In case others have this issue…
The issue was: Pressing H would not give me the help file. After getting it working I see I was missing other things as well like lots of the welcome text.

open("/usr/local/etc/ax25/fbb/lang/english.hlp", O_RDONLY) = 8 
fstat(8, {st_mode=S_IFREG|0644, st_size=62459, ...}) = 0 
mmap(NULL, 4096, PROT_READ|PROT_WRITE, MAP_PRIVATE|MAP_ANONYMOUS, -1, 0) = 0x7f2bba612000 
read(8, "################################"..., 4096) = 4096 
read(8, "erver menu, and continue from\nth"..., 4096) = 4096 
read(8, "information on one special comma"..., 4096) = 4096 
read(8, "   -  Download a file with AUTOB"..., 4096) = 4096 
read(8, "he current line.  The number can"..., 4096) = 4096 
read(8, "T new in 5.15b\n@@ 9 BGET\n\nComman"..., 4096) = 4096 
close(8)                                = 0 
munmap(0x7f2bba612000, 4096)            = 0 
lseek(4, 0, SEEK_SET)                   = 0 
read(4, "MemTotal:       32896168 kB\nMemF"..., 999) = 999 
write(3, "\r- Type ? [COMMAND] for the HELP"..., 250) = -1 EMSGSIZE (Message too long)

duckduckgo.com search showed EMSGSIZE (Message too long) had to do with packet sizes allowed. Made me think it may relate to max packet length setting in axports
The fix was:

in /etc/ax25/axports…
name Call speed paclen window desctiption
1 WD1F-1 9600 128 2 144.01 MHz (1200 bps)

I had to set paclen to 255 like this:
1 WD1F-1 9600 255 2 144.01 MHz (1200 bps)

Howto set ax25 Parameters

Howto set ax25 parameters on a tnc in kissmode.

  /usr/local/sbin/kissattach /dev/ttyUSB0 1 44.137.31.85 > /tmp/ax25-config.tmp
  awk '/device/ { print $7 }' /tmp/ax25-config.tmp > /tmp/ax25-config-tmp
  Device=ax0 


# Check for Device
  if [ -d /proc/sys/net/ax25/$Device ]
    then cd /proc/sys/net/ax25/$Device/
       /etc/ax25/ax25parms
       echo -e "Port 1 attached to $Device"
    else echo -e "** Error setting $Device parms*"
  fi
         echo -e -n "$"

Below the file ax25parms. (chmod 755)

#! /bin/bash

# Parms for a USER Port
echo 5000    > t1_timeout               # (Frack)
echo 500     > t2_timeout               # (RESPtime)
echo 300000  > t3_timeout               # (Check)
echo 900000  > idle_timeout             # Idle Timer
echo 5       > standard_window_size     # Outstanding Frames
echo 8       > maximum_retry_count      # Max Retrys
echo 256     > maximum_packet_length    # Paclen
echo 0       > ax25_default_mode
echo 0       > ip_default_mode
echo 0       > backoff_type
echo 2       > connect_mode
#echo 180000 > dama_slave_timeout
echo 32      > extended_window_size
echo 0       > protocol


9600 BAUD Parameters

TXDelay…….between 8 and 15 – set for best throughput BUT that depending upon your RIG. Several commercial rigs they don’t accepts TXD less than 25-30 because they needs enough time to “LOCK-on” the PLL unit, otherwise the TX signal is unusable. Of course, if you want that values (8-15), we talking for modern Transmitters using PIN-diodes and very fast PLL-units for RX-TX swithces and NOT for RIGs with Relays in the output and slllooowwww PLLs… Relays and slow-PLLs have extremely large values between RX-TX, which that means Hi-Value TXD settings!

RESPtime …..100 mS seems to have better results than 0

Frack……….. 8 seconds on a busy channel; but never less than 5 sec

PERSIST…….128/users; if it’s a pretty clean channel, 64 is nice; if it’s busy, guesstimate the average number of users and divide 128 by this number, i.e. 4 users = 128/4 = 32

SLOTTIME… 20

MAXFrame… If the channel is great, 7; average, 3; rough, 1

RETry……….15

Check………. 300 seconds

MAXFrame

Again, let’s not complicate the commands any more than we have to. This is another of the “throughput’ , timing commands in the TNC which can be made into a monster. Let’s use some common sense and simplify its use by applying two simple and easy-to-remember rules for its use.

1. When operating VHF, use the (default) value of  4. If connected direct with good connect path and no other traffic, use MAXFrame 7 .

  1. When using the HF bands, good or favorable conditions use 2 FAIR, or  poor conditions use 1.

PACLen

Let’s really uncomplicate these final two commands. I can bet on at least 40 letters from some of my friends and some users who are old-timers (or who think they are) giving me “the dickens” or a rebuttal about these next two commands. I’m about to simplify these two commands to the point of possible over-simplification. Over-simplification of a command is not to the liking of a few users.
They feel that because their early packet, days were difficult, so should be every one else’s. Νo  one has more reason to complain about those days than I do, but who wants to complain?   Even in those days we were having fun with packet.

The only difference between packet  radio now and then is now we have more packeteers with whom to QSO, and the terminal program features have given us a medium that is far more than the  “ΤYPE”  and  “SEND”  system of six or  seven years ago.

Now that the history lesson is over, let’s get to the PACLen setup of the TNC.
There are three simple rules for this command, and they are.

  1. When using nodes or digipeaters on VHF, set PACLen 128 (normal default of most TNCs).
  2. When usingdirectconnects, and with near perfect connect paths, set PACLen 255 (some TNCs accept PACL 0 as 255).
  3. When operatingHFpacket, set PACLen 32 for300 b/s or  PACLen 64 for 1200 b/s.